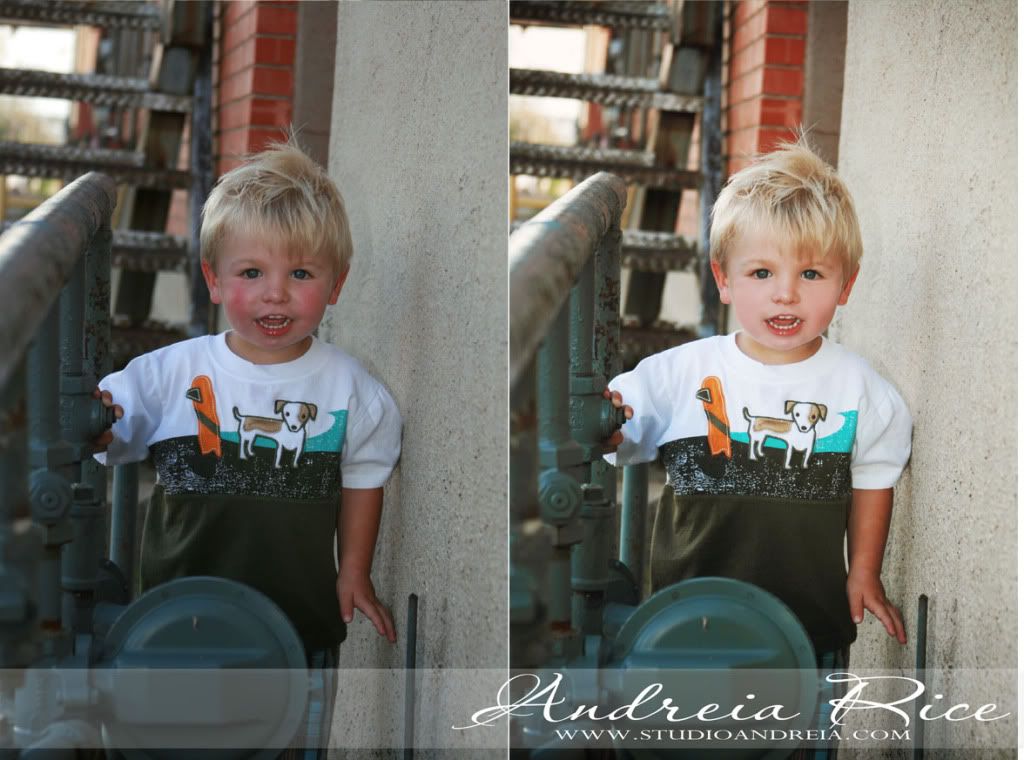
Many people have asked me how I process my photos. Although I am not going go give away my step by step process(I have put in too many hours to give away all my secrets) I will show you a before and after photo and tell you a few of the steps I took.
The photo to the left is a RAW photo. I like to use RAW photos because I like to adjust every aspect of the photo myself. (I do shoot in JPEG as well just not that often) The edited photo on the right was edited in Photoshop...I love to edit pictures, I think editing is my favorite part of being a photographer. So in this edit I first added a soft center light to make the picture not so dark. Next, I adjusted the saturation, tone, contrast, gradient fill and then added a little color wash...in the color wash I used a light tan. After I have edited the picture I go in and airbrush anything that is out of place. You can see that I edited the little boys cheeks, he had been running and playing so his face started to get a little red at the end of our shoot. So there is my example of a before and after photo! Hope you enjoy!


3 comments:
darn good job gal, Believe me, I know how hard it is to edit pictures even WITH a program. Again, GREAT job. keep up the good work. - Nana
wow more goes into this then I though . Beautiful Job Andreia!
Super Job! You do such a wonderful job with your pictures
Post a Comment